Sending large files by email, or trying to work collaboratively with someone online on a project becomes cumbersome and wastes valuable time. If you have an Office 365 subscription, follow these simple steps to setup an online file store and share it with others.
This guide covers two separate steps, the first is setting up the OneDrive shares and getting your files out to the world, and the second is the optional setup of the Microsoft file synchronisation tool.
OneDrive
- Connect to the Microsoft Office 365 Portal, visit: https://portal.office365.com and login with your account
- You should see a number of icons across the top of the page, you are looking for the OneDrive icon, click on that to open your personal OneDrive
- Once you are in your one drive, you can drag and drop files from your desktop up to the cloud, create folders, and do the regular file maintenance you might expect. Lets make a new folder, called 1-SharedDocuments by right clicking on the background and then clicking new, and then folder.
- Once you have the new folder, click the checkbox to the left of the name, and a new set of menu options will appear at the top, select the share option

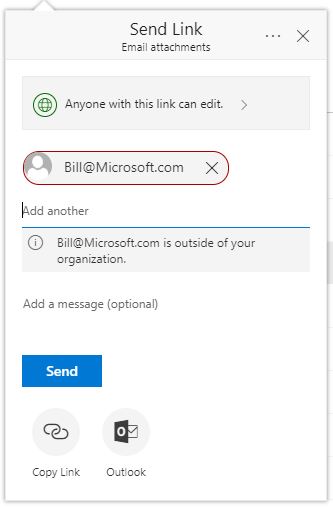
- If you add a message here, you can send a sharing link directly, or you can send the link to outlook, or even use the copy link button to get a URL which you can cut and paste into an email or online chat if required
OneDrive File Sync
In order to setup the optional file sync software provided by Microsoft, please follow along with the following steps
- Unselect any files or folders you may have checked in the previous steps
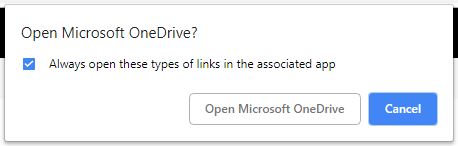
- Click on the Sync icon at the top of the page, you may see an popup asking to allow the OneDrive software to make changes or the page to make open local software
- When the local OneDrive app first starts, it may prompt you to login, use the same account credentials as you used at the beginning of this tutorial
- Once you have completed the login process, you will see a scree showing your current folders on the OneDrive cloud
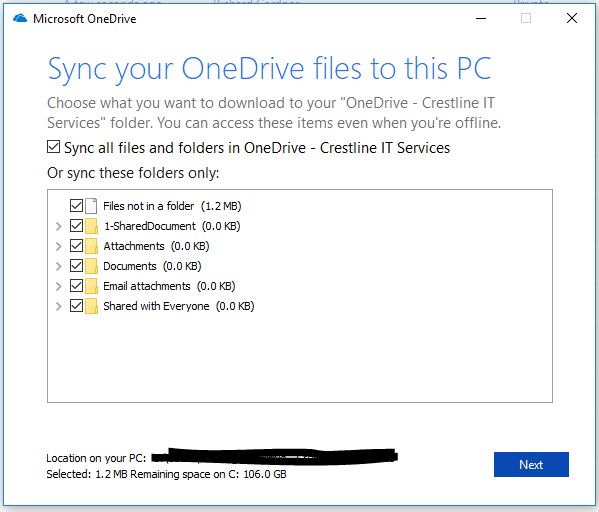
- Only folders are shown, if you leave the files not in a folder checked, all of the root level files will be synced as well. For this tutorial, lets uncheck all but the 1-SharedDocument folder we created in the first half of the tutorial.
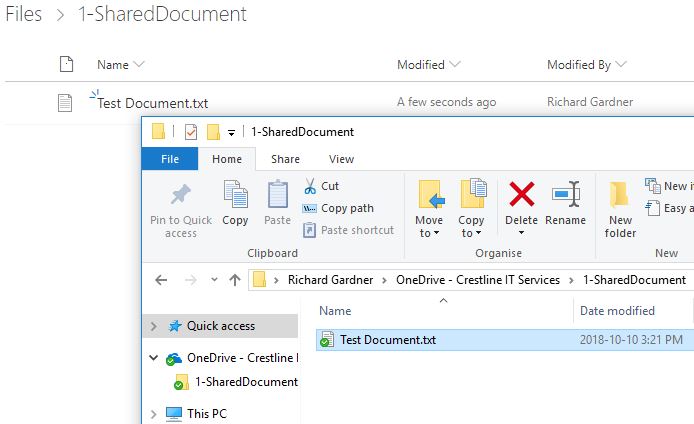
- Once you complete the initial wizard, you will have a new set of folders in you file explorer which correspond to the new OneDrive folders we just created. If you create a file in one location, it automatically gets synced to the other, and the same for any changes made to those fields
That’s it for the basic setup of OneDrive and the sync tool, I am sure you will find it an easy to use tool which will effectively aid in your collaborative work with others, or simply sharing files too big to fit in an email.